The holidays are a great time to let your inner crafting diva out. Whether you are decorating your home or creating one-of-a-kind gifts the whole family will love, here are 5 great do-it-yourself projects just in time for the holiday season.
After all, who doesn’t love an excuse to play around with rhinestones?
1. Rhinestone Candles
Have you ever noticed those gorgeous blingy holiday candles? Your eye catches those dazzling sparkles and you are hooked…until you see the inflated price tag. Why not get the enjoyment (and price savings) of doing it yourself? It’s really easy and the outcome is beautiful.
What you need:
- Candle (s) in the color/scent of your choosing
- Rhinestones
- Stud Covers
Decide what design or color pattern you would like to go with first. You may want to print it out or draw it ahead of time if it is a bit more intricate. Next you will put the rhinestones in the stud covers. These basically create a point that will allow you to easily press them in to the wax. Once you are all set, simply press the rhinestones into the wax and now you have a great centerpiece for your holiday party! If you want to be able to decorate with this for seasons to come simply use a tea light once your candle burns down about half way so that you can preserve it.
2. Recycled Rhinestone Ornament

Crafting your own holiday ornaments each year is a great way to create memories.
What you need:
- Recycled metallic lids
- Mod Podge Gloss
- Mod Podge Dimensional Magic
- Brush
- Rhinestones
- Power Drill
- Ribbon
First begin by drilling a small hole in the edge of each lid that you are using. This will be where you will attach the ribbon for hanging. Next, brush the Modge Podge onto the inside of the lid and place your rhinestones into the glue. If you want to add even more sparkle and shine, you can sprinkle glitter in the glue or you can actually place some of the rhinestones upside down. This will create more dimension an even more eye-catching sparkle. Once the glue has dried, take the dimensional magic and pour it all around the rhinestones. This part will make your gems look like they are in resin when dried. Once this part is dry, thread your ribbon through the hole you created and you are ready to hang your ornament on the tree! For images check out this post.
3. Monogrammed Coffee Mug

Any time you monogram a present, you are truly making it unique and customized for the person you are giving it to. Monogrammed coffee mugs are a great way to create a one-of-a-kind gift.
What you need:
- 1 glass mug
- Rhinestones
- Non-toxic crafting glue
First create a map of how you would like the letter to look. This will make knowing where to put the rhinestones much easier. Next use your non-toxic crafting glue (make sure it is approved for use on glass) to apply a small dot on the glass. Press your flat back rhinestone into the glue and hold for 2 to 3 seconds. Repeat the process until all your stones are set. These mugs are best preserved by handwashing and shouldn’t be used in the microwave.
4. European Crystal Initial
Another great gift idea is to create a European crystal initial. This decoration is a great way to personalize a dorm room, bedroom, nursery or basically any room in the home. The good news is that it is super easy to make!
What you need:
- Cloth Letter (You can find these in your local craft store)
- Rhinestones
- HotFix Wand
Pick out the crystals you would like to use. Typically a variety of sizes looks really great. Now, using your HotFix rhinestones and wand, simply apply the heat to the back of the rhinestone and apply them in the pattern of your choice!
5. Blinged Out Cell Phone Covers

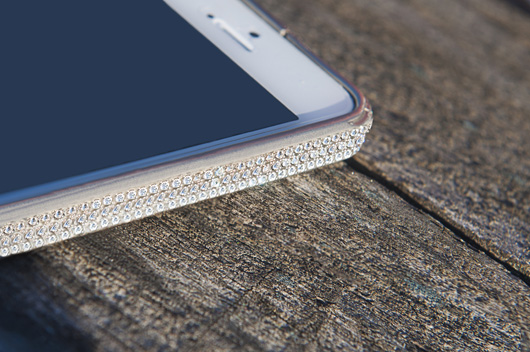
Today, nearly everyone has a smart phone, but do they have a totally unique blinged out cover? Probably not. Here’s your chance to create a great gift for any member of your family.
What you need:
- 1 plain cell phone cover
- Rubbing alcohol
- Small rhinestones
- Applicator stick
- A sewing pin
- GemTac Glue
- Small paint brush
First, clean the surface of the cell phone cover with the rubbing alcohol. Use the pin to put down the nozzle of the glue when you open it (it often closes over). Then tax the applicator (which has a wax point) and roll the ends into a point. Place the rhinestones in a dish and deliver a few drops of glue to the back of the case. Then, using the small brush, spread the glue in to a thin layer. Lightly touch the applicator sticks to the stones and begin arranging them in the pattern you would like. Continue doing this and once done, let the glue dry for a full 24 hours before wrapping it up to put under the tree.


